SO I AM GOING TO ATTEMPT TO MAKE A BUILT IN AMPLIFIER IN THIS GUITAR. I HAVE BEEN RESEARCHING AS MUCH AS I CAN FOR AT LEAST 6 MONTHS, AND I THINK I AM FINALLY READY TO GET STARTED. TO DATE, MY ELECTRICAL EXPERIENCE IS .........WELL WHEN I FLIP A SWITCH THE ROOM MAGICALLY LIGHTS UP! I KNOW LITTLE TO NOTHING.... SO I WILL BE GOING SLOW AND MAKING SURE I DONT DO ANYTHING TOO STUPID. I HAVE SOLDERED THE 2 GUITARS BEFORE THIS....AND SOLDERED THEM VERY POORLY! BUT THEY WORKED AND MADE MY LIFE JUST A LITTLE BIT HAPPIER. AND THATS WHAT I AM AIMING FOR HERE!! IF YOU KNOW YOUR ELECTRIC STUFF, LOOK AWAY.... OR WATCH TO SEE WHERE I MESS UP! I AM EXCITED TO SEE IF I CAN DO THIS, SO HERE WE GO.........
1. MOST OF THE PARTS
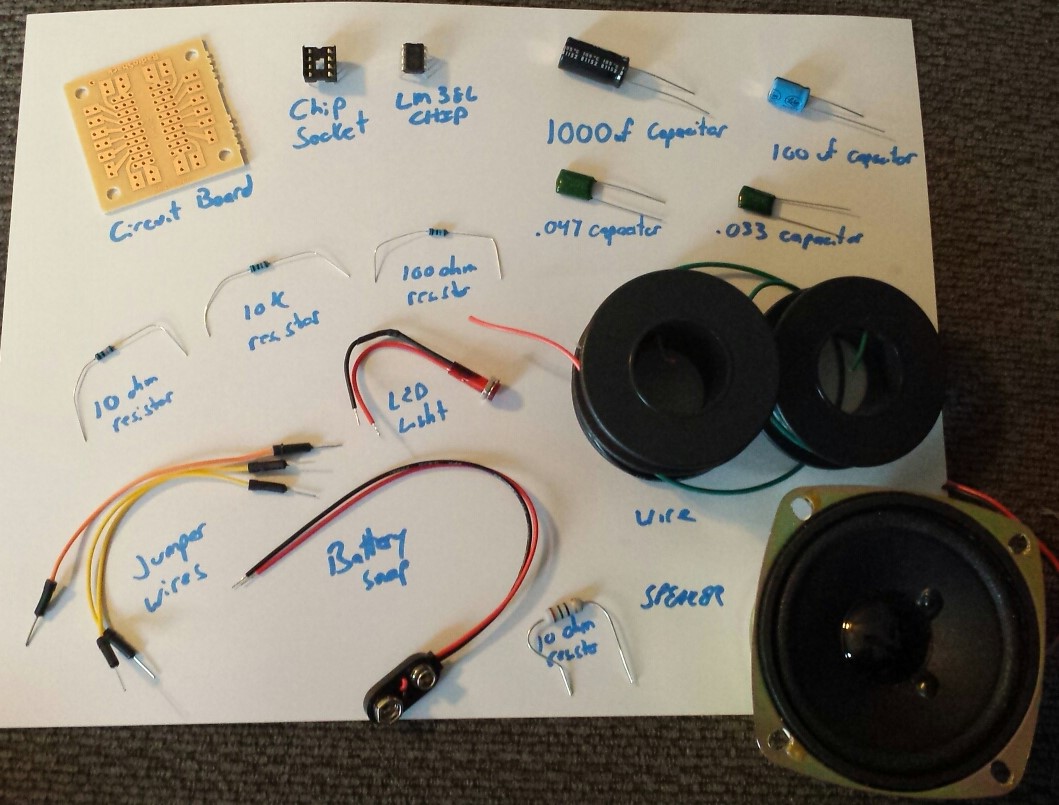
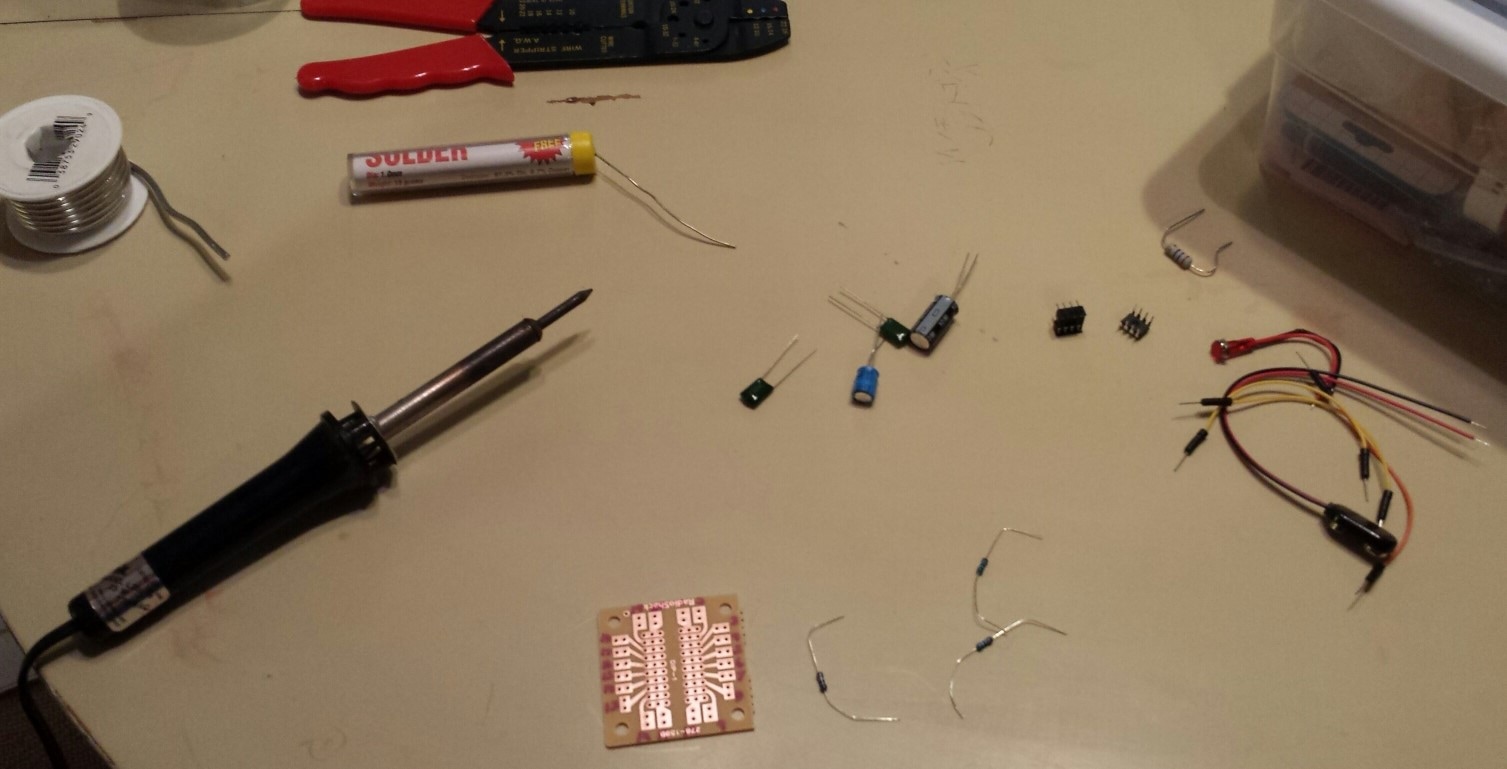
I WILL BE FOLLOWING A DIY MINI AMP BUILD THAT I FOUND ON THE INTERNET MACHINE...IT SAYS IT SHOULD "ROCK". HERE IS A PIC OF ALL THE PARTS...
2. CIRCUIT BOARD
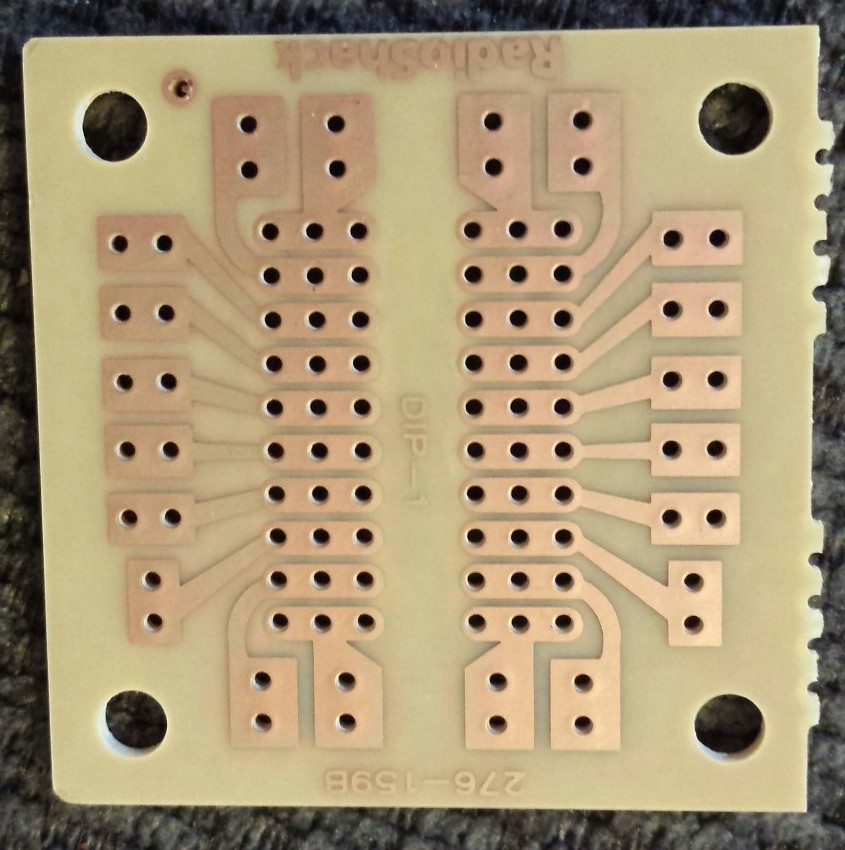
THIS IS PRETTY SMALL, THERES ACTUALLY NOT MUCH TO THIS AMP...IF YOU KNOW WHAT YOU ARE DOING....
 |  |
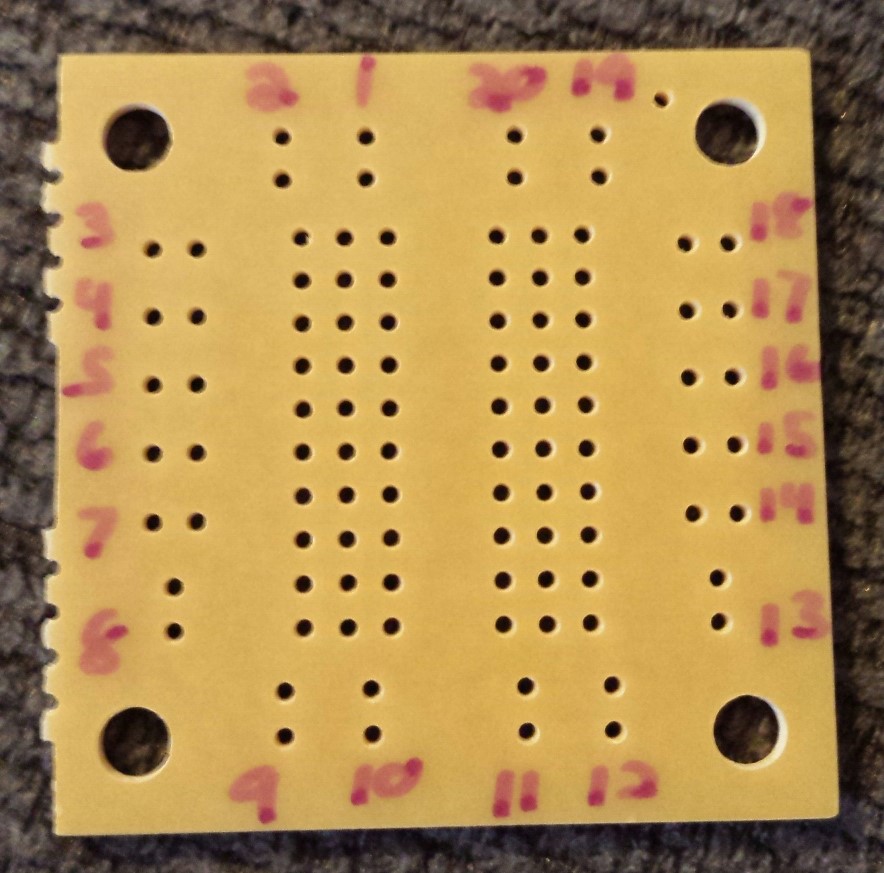
3. LABEL THE TRACES
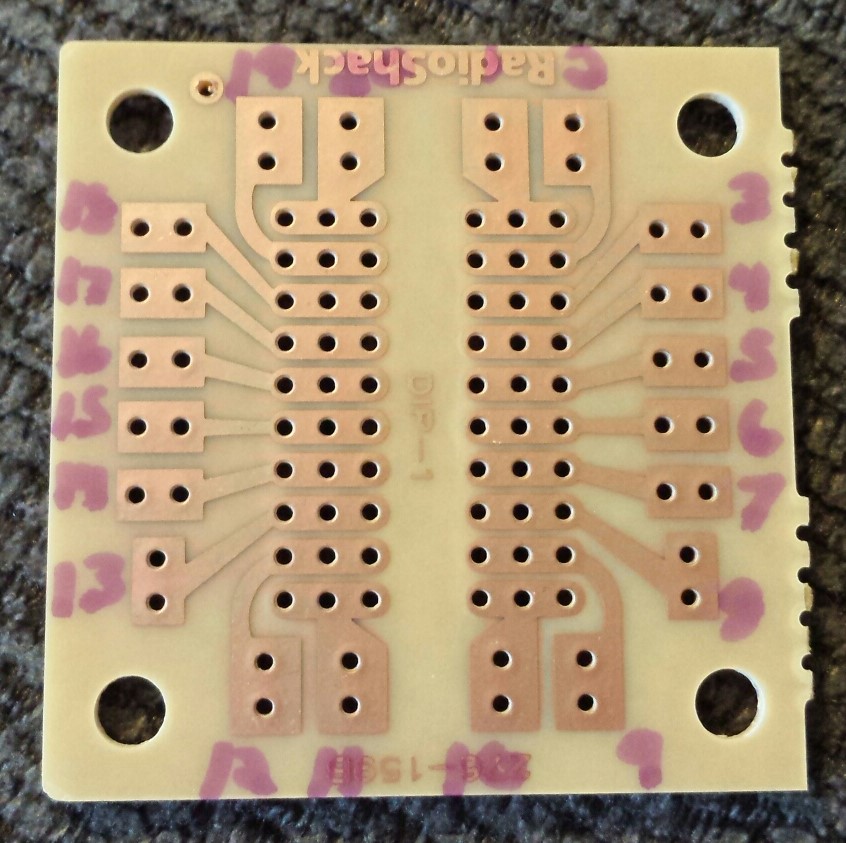
SINCE IT KIND OF LOOKS LIKE THE HEAD OF MEDUSA, IT IS RECOMMENDED TO MARK THE TRACES SO YOU KNOW WHERE TO PUT THINGS...
 |  |
4. WORKSTATION
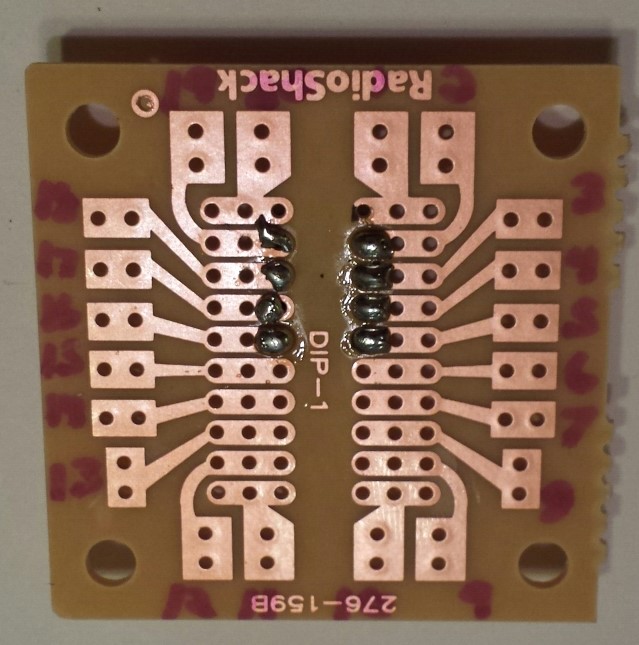
5. FIRST COMPONENT SOLDERED
DID I MENTION I AM TERRIBLE AT SOLDERING.....BUT THE CHIP SOCKET IS IN. I BELIEVE THE MOST IMPORTANT THING WILL BE TO MAKE SURE THE COPPER TRACES DONT TOUCH EACH OTHER OR "SPILL" OVER ONTO EACH OTHER......
6. WORK IN PROGRESS
I AM GOING VERY SLOW AND TRYING TO BE NEAT.....SOME CAPACITORS......
 |  |
7. MAJOR COMPONENTS DONE....
GOT MOST OF THE "STUFF" ON THERE....I WAS PRETTY HAPPY WITH THE SOLDERING UNTIL THE DANG LAST THING I DID (THE GOB DOWN THERE BETWEEN 2,3,AND 4)...I WILL LOOK AT IT UNDER A MAGNIFYING GLASS AND SEE IF I NEED TO SEPARATE ANYBODY......
 |  |
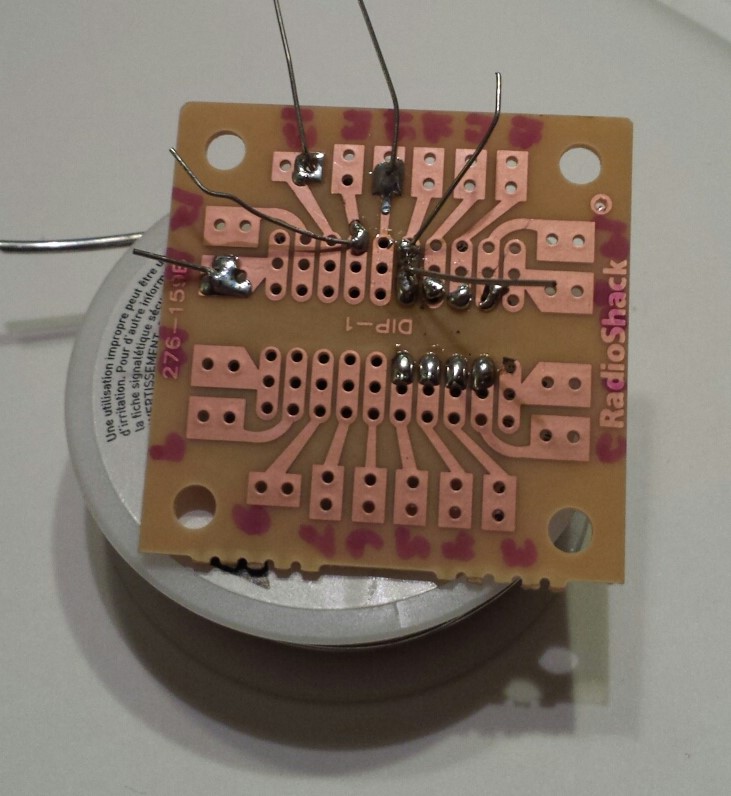
8. MORE STUFF
GOT A LITTLE MORE DONE TONIGHT....I REALIZED I HAD FORGOT A CAPACITOR, SO I GOT THAT ON. THEN THE RECIPE CALLS FOR 3 JUMPER WIRES, SHOWN HERE IN GREEN. THEN THERES THAT SOLDERING.....I'LL GET THE HANG OF IT SOME DAY!
 |  |
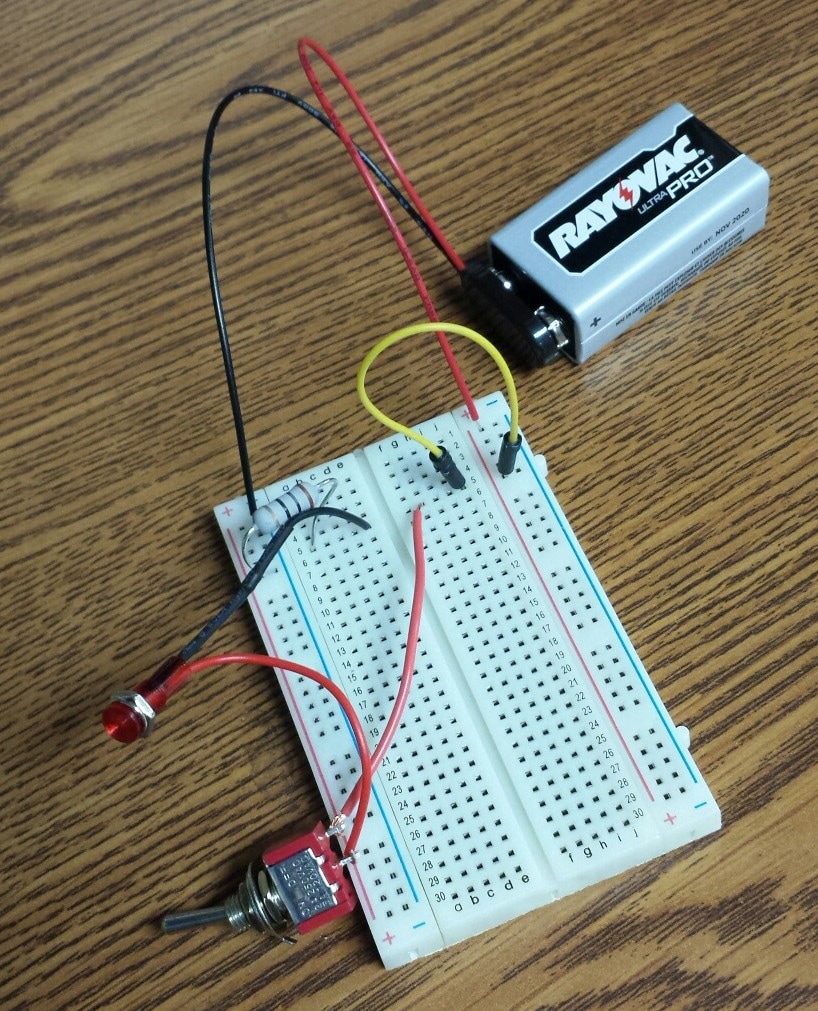
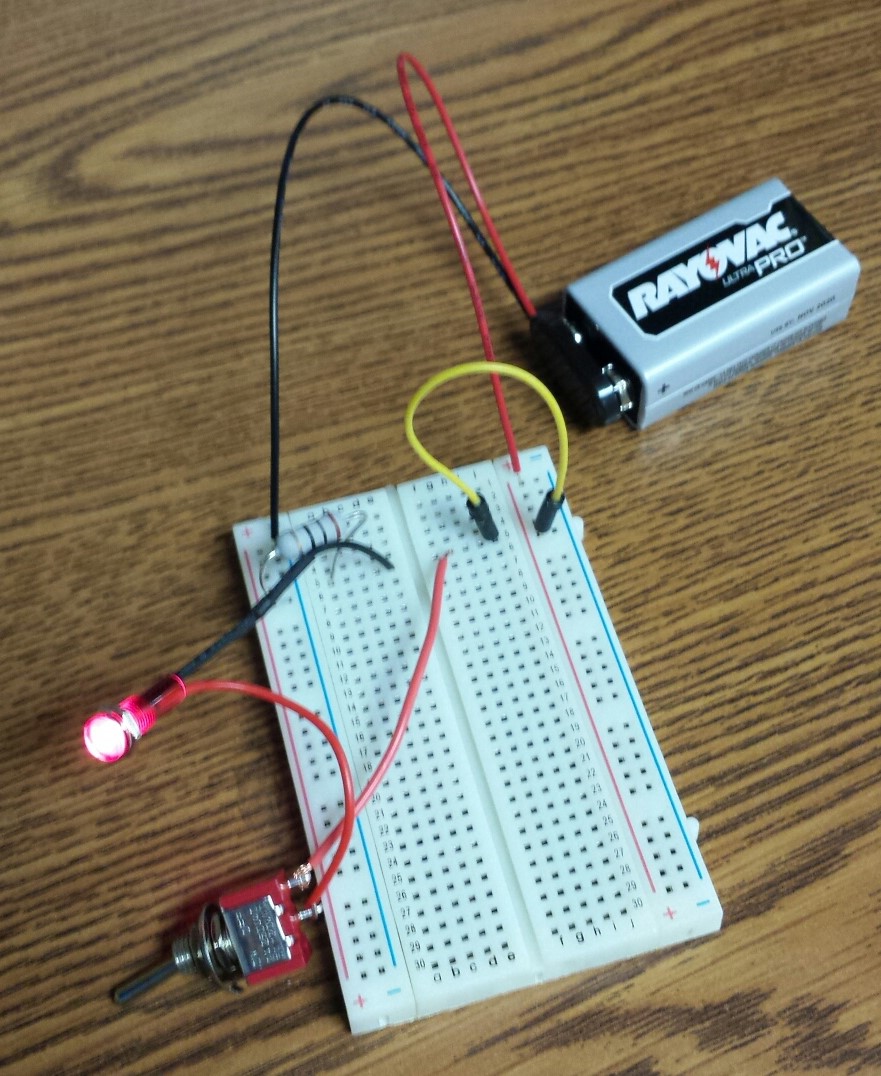
9. TESTING
BEING MY FIRST TIME WORKING WITH CIRCUITS, I TRY TO TEST EVERYTHING THAT I CAN TO SEE IF IT WILL WORK. THIS WILL HOPEFULLY BE THE POWER SUPPLY TO THE AMP. THE IDEA WILL BE WHEN THE TOGGLE SWITCH IS ON, THE RED LIGHT COMES ON TELLING ME ITS RUNNING OFF OF THE 9 VOLT. IN THE OFF POSITION, IT WILL BYPASS THIS ALL TOGETHER AND I WILL BE ABLE TO PLUG IT INTO A REGULAR GUITAR AMP.
 |  |
10. AMP TEST
I DECIDED TO PLAY AROUND ON THE BREADBOARD AND SEE IF I COULD GET ANYTHING TO WORK.....IT WORKS BUT SOUNDS A LITTLE ROUGH.....
11. AMP TEST
HERE IS THE SAME SET UP USING THE GUITAR I MADE FOR ERICK.......HMMMMMM. THAT SOUNDS MUCH BETTER.....NOT SURE WHAT TO THINK NOW......
12. AMP TEST
AND OF COURSE THE BOSS HAD TO HAVE A GO, AS PEPPA WOULD SAY!!!
MANY MOONS PASS..........
This has definitely been a work in progress...I've been working on this for a while. I think i have it now, but went a different direction than the above amp.
13. amp 2
So I have been messing around with this amp for a long time. My soldering skills have been terrible, (but gotten better as I have been making lots of mistakes), and I have gone through a lot of different components and boards trying to figure this out. I am somewhat pleased to say that I finally have a working amp, and am hopefully inspired to move forward.
14. amp 2....the board
Little did I know that they made a circuit board exactly like the breadboard I was prototyping on. That made it easy to copy once it was working on the breadboard.
| BREADBOARD  | CIRCUIT BOARD  |
15. AMP 2....COMPONENTS
The first component I put in was the socket that will hold the chip for the amp. There are 8 pins that all have their roles in the operation. After that was on I soldered some jumper wires. This was easier to do before the other components were soldered on.
| CHIP SOCKET 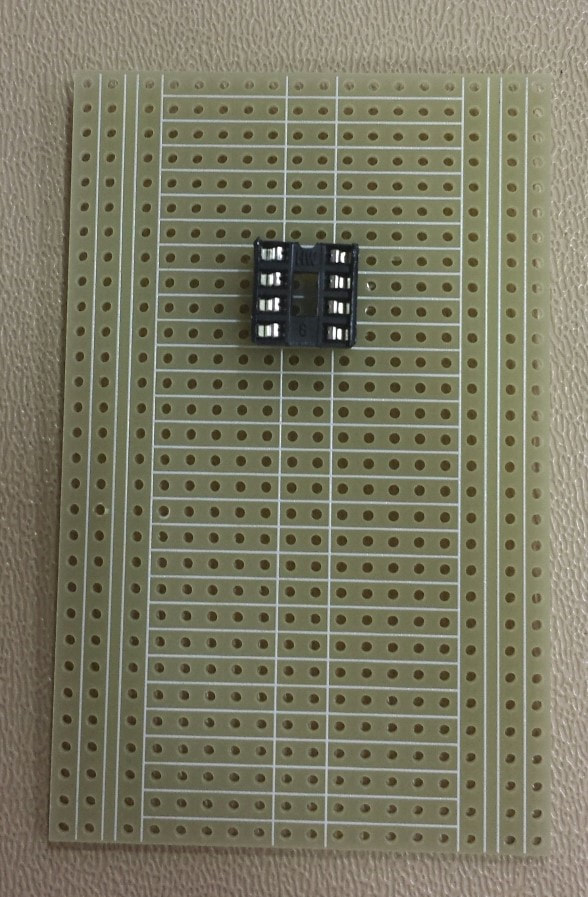 | JUMPER WIRES 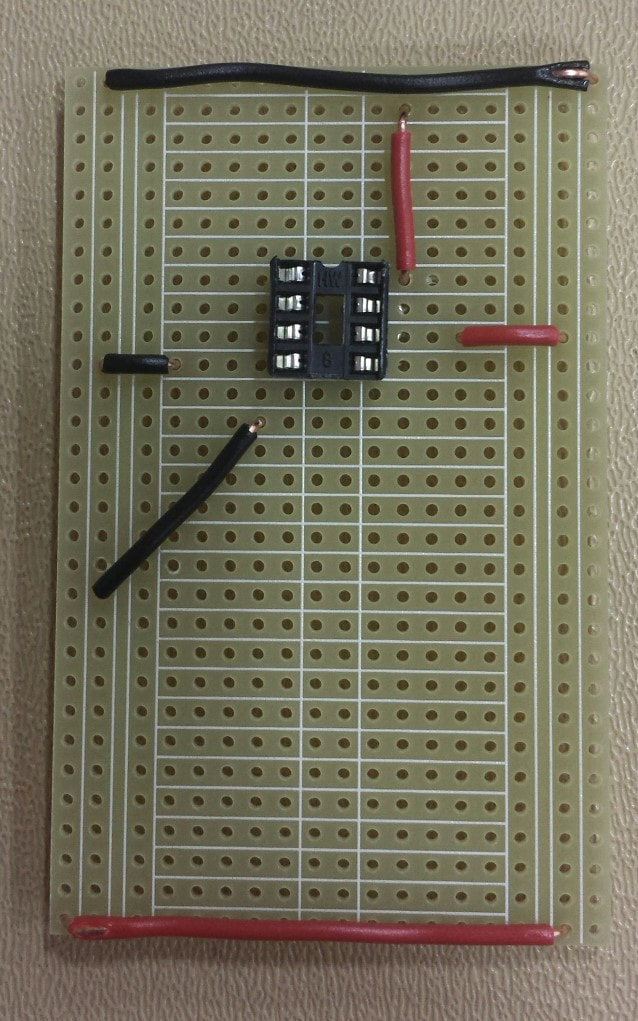 |
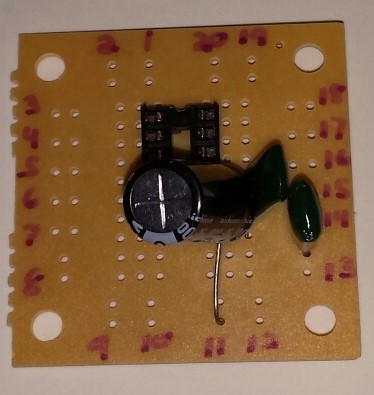
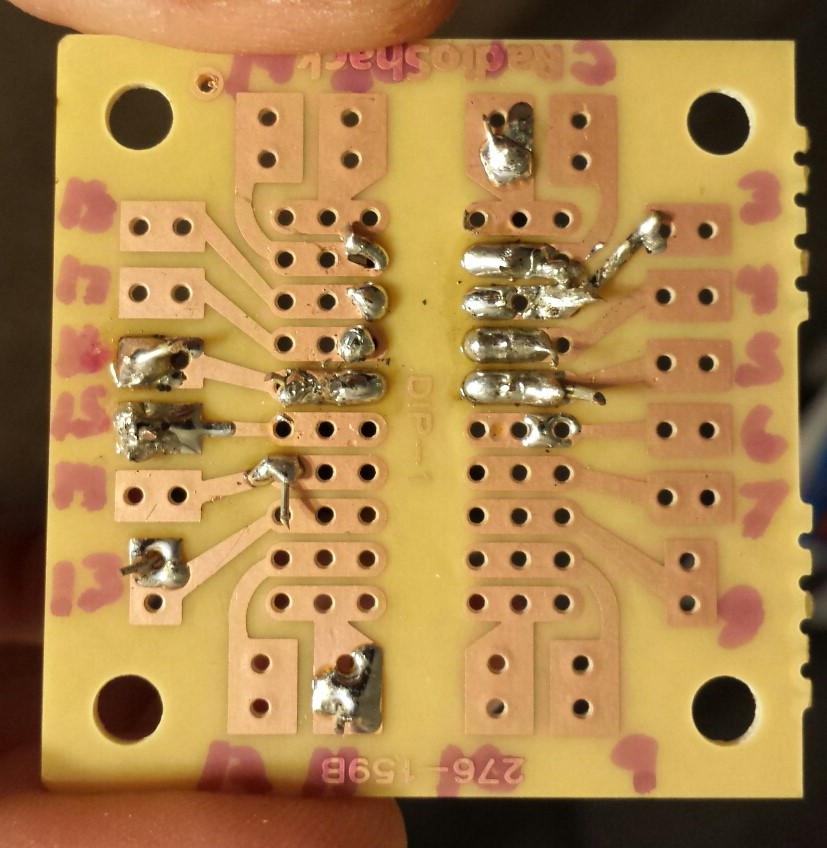
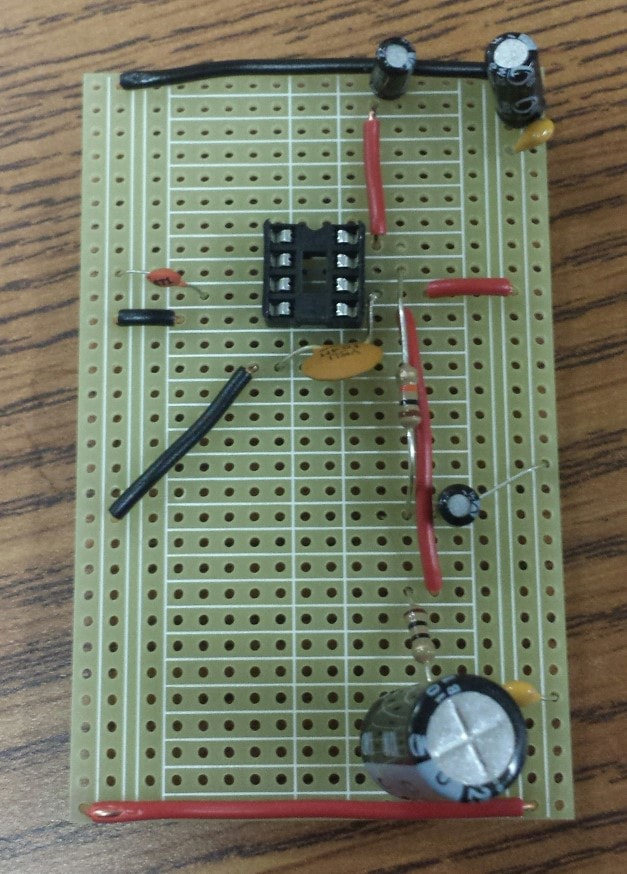
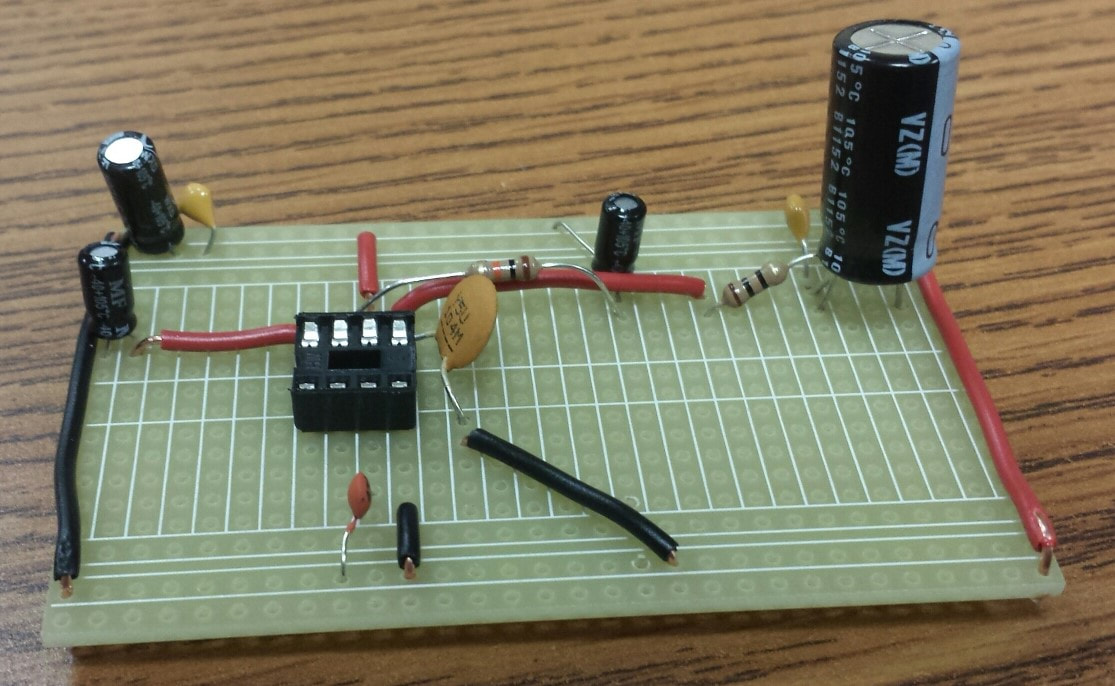
16. AMP 2....ALL OTHER BOARD COMPONENTS
Next I put on all the capacitors and resistors. Went pretty good, no bad soldering yet!
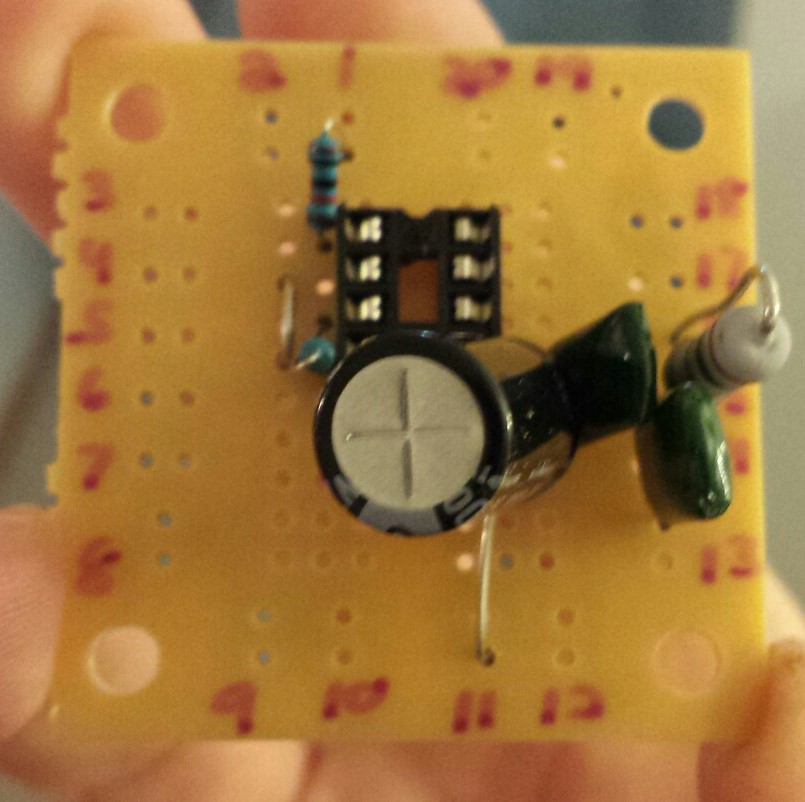
17. AMP 2....OTHER COMPONENTS / GUITAR STUFF
After all of the board components were soldered on, I moved on to the crazy stuff. There are basically 6 "arms" that come off of this thing. There is a 9 volt battery snap to give it power. There is the 1/4 inch guitar input jack. There are 3 potentiometers (the turning knobs) that control volume, gain, and bass. And finally there is the old computer speaker.
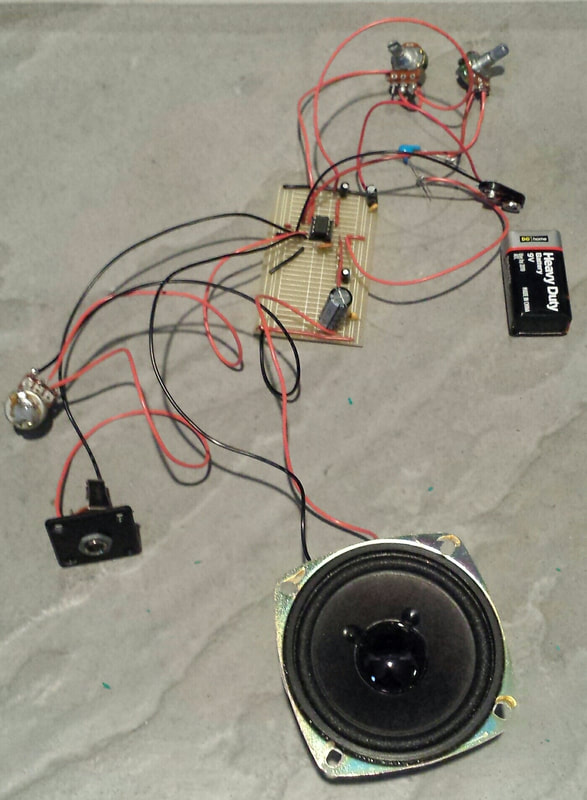
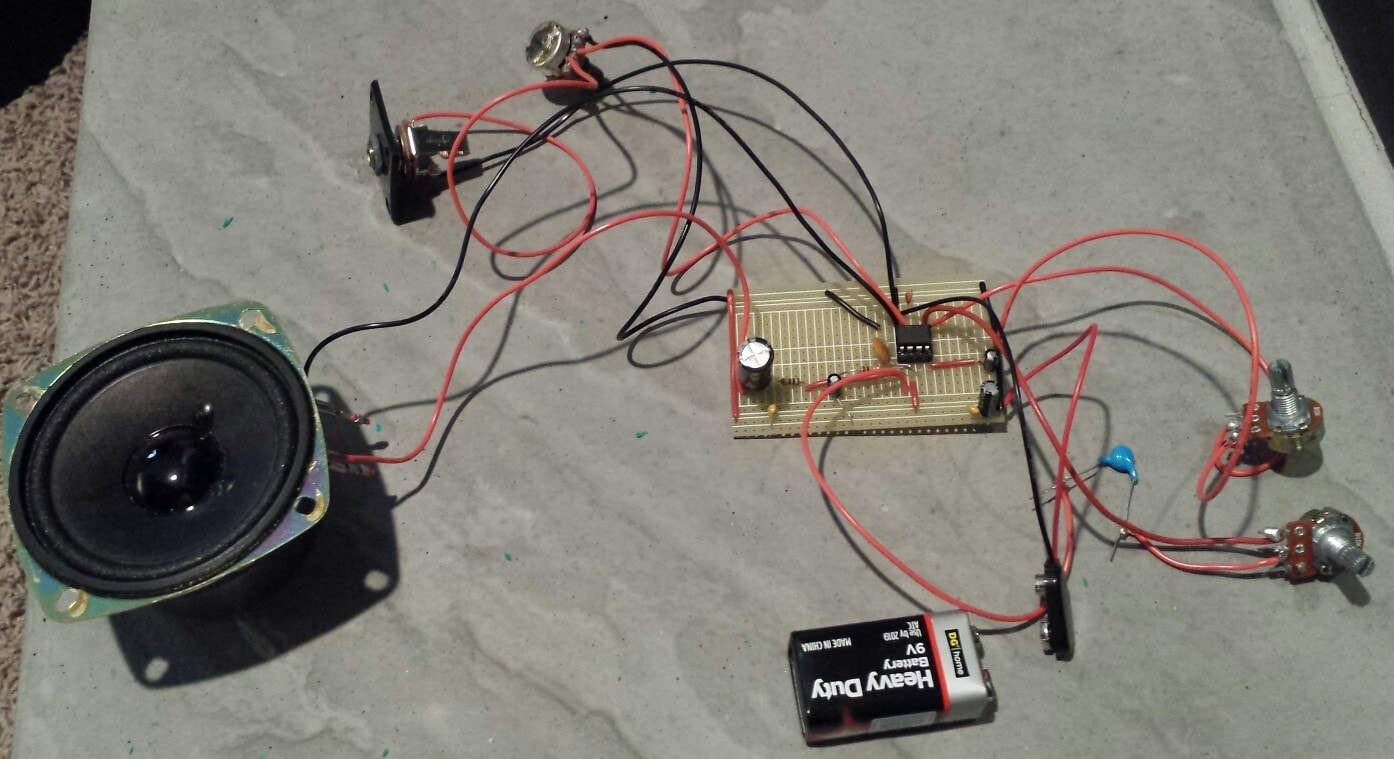
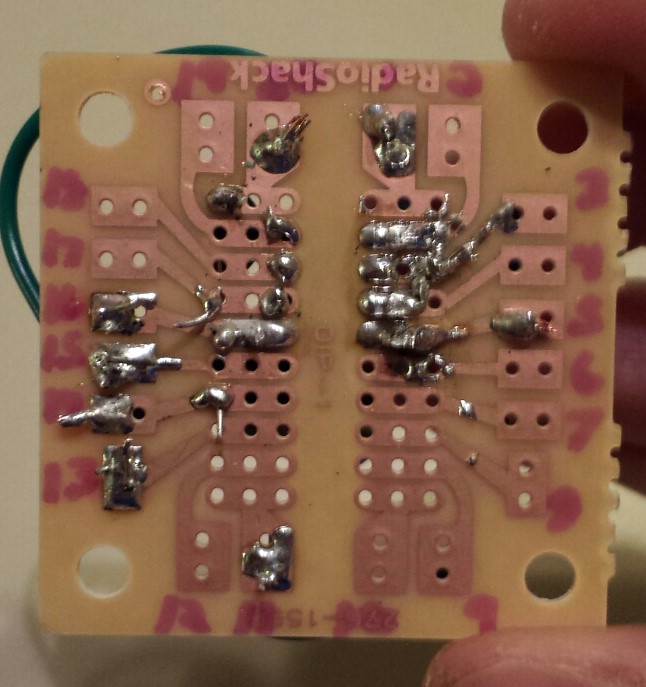
At this point every thing is soldered up and ready to test. Just a tidbit for you, I have been at this point no less than 6 times over the past month...each time it did not work and I would spend the next few days looking for shorts or bad soldering joints...fingers crossed........
18. AMP 2.... SOUND TEST 1
19. AMP 2.... SOUND TEST 2
20. AMP 2.... IT WORKS!!!!
Hooray!!!! It works. Maybe a little tweaking here and there...but it works. I do at some point want to add an on/off toggle switch and a red LED light. Surely I cant screw that up....we shall see!
